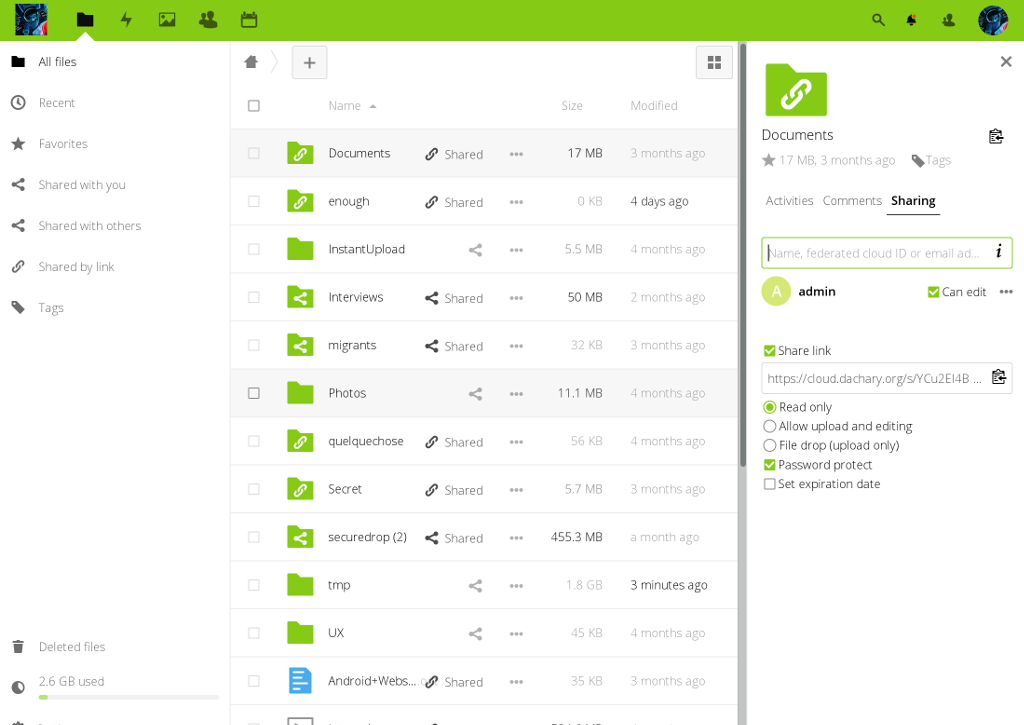
Efficient algorithms and programs for the analysis of the ever-growing amount of biological sequence data are strongly needed in the genomics era. The pace at which new data and methodologies are generated calls for the use of pre-existing, optimized – yet extensible – code, typically distributed as libraries or packages. This motivated the Bio++ project, aiming at developing a set of C++ libraries for sequence analysis, phylogenetics, population genetics and molecular evolution. The main attractiveness of Bio++ is the extensibility and reusability of its components through its object-oriented design, without compromising on the computer-efficiency of the underlying methods. We present here the second major release of the libraries, which provides an extended set of classes and methods. These extensions notably provide built-in access to sequence databases and new data structures for handling and manipulating sequences from the omics era, such as multiple genome alignments and sequencing reads libraries. More complex models of sequence evolution, such as mixture models and generic n-tuples alphabets, are also included.
The article was published May 21st, 2013. Read the full article : Bio++: efficient, extensible libraries and tools for computational molecular evolution
Bio++: efficient, extensible libraries and tools for computational molecular evolution
Virtualizing legacy hardware in OpenStack
A five years old hardware is being decommissioned and hosts fourteen vservers on a Debian GNU/Linux lenny running a 2.6.26-2-vserver-686-bigmem linux kernel. The April non profit relies on these services (mediawiki, pad, mumble, etc. ) for the benefit of its 5,000 members and many working groups. Instead of migrating each vserver individually to an OpenStack instance, it was decided that the vserver host would be copied over to an OpenStack instance.
The old hardware has 8GB of RAM, 150GB disk and a dual Xeon totaling 8 cores. The munin statistics show that no additional memory is needed, the disk is half full and an average of one core is used at all times. A 8GB RAM, 150GB disk and dual core openstack instance is prepared. The instance will be booted from a 150GB volume placed on the same hardware to get maximum disk I/O speed.
After the volume is created, it is mounted from the OpenStack node and the disk of the old machine is rsync’ed to it. It is then booted after modifying a few files such as fstab. The OpenStack node is in the same rack and the same switch as the old hardware. The IP is removed from the interface of the old hardware and it is bound to the OpenStack instance. Because it is running on nova-network with multi-host activated, it is bound to the interface of the OpenStack node which can take over immediately. The public interface of the node is set as an ARP proxy to advertise the bridge where the instance is connected. The security group of the instance are disabled ( by opening all protocols and ports ) because a firewall is running in the instance.
Continue reading
OpenStack Upstream University training
Upstream University training for OpenStack contributors include a live session where students contribute to a Lego town. They have to comply with the coding standards imposed by the existing buildings. More than fifteen participants created an impressive city within a few hours during the session held in may 2013. The images speak for themselves. The next sessions will be in Paris in June and Portland in July.

Continue reading
Installing ceph with ceph-deploy
A ceph-deploy package is created for Ubuntu raring and installed with
dpkg -i ceph-deploy_0.0.1-1_all.deb
A ssh key is generated without a password and copied over to the root .ssh/authorized_keys file of each host on which ceph-deploy will act:
# ssh-keygen Generating public/private rsa key pair. Enter file in which to save the key (/root/.ssh/id_rsa): Enter passphrase (empty for no passphrase): Enter same passphrase again: Your identification has been saved in /root/.ssh/id_rsa. Your public key has been saved in /root/.ssh/id_rsa.pub. The key fingerprint is: ca:1f:c3:ce:8d:7e:27:54:71:3b:d7:31:32:14:ba:68 root@bm0014.the.re The key's randomart image is: +--[ RSA 2048]----+ | .o. | | oo.o | | . oo.+| | . o o o| | SE o o | | . o. . | | o +. | | + =o . | | .*..o | +-----------------+ # for i in 12 14 15 do ssh bm00$i.the.re cat \>\> .ssh/authorized_keys < .ssh/id_rsa.pub done
Each host is installed with Ubuntu raring and has a spare, unused, disk at /dev/sdb. The ceph packages are installed with:
ceph-deploy install bm0012.the.re bm0014.the.re bm0015.the.re
The short version of each FQDN is added to /etc/hosts on each host, because ceph-deploy will assume that it exists:
for host in bm0012.the.re bm0014.the.re bm0015.the.re do getent hosts bm0012.the.re bm0014.the.re bm0015.the.re | \ sed -e 's/\.the\.re//' | ssh $host cat \>\> /etc/hosts done
The ceph cluster configuration is created with:
# ceph-deploy new bm0012.the.re bm0014.the.re bm0015.the.re
and the corresponding mon are deployed with
ceph-deploy mon create bm0012.the.re bm0014.the.re bm0015.the.re
Even after the command returns, it takes a few seconds for the keys to be generated on each host: the ceph-mon process shows when it is complete. Before creating the osd, the keys are obtained from a mon with:
ceph-deploy gatherkeys bm0012.the.re
The osds are then created with:
ceph-deploy osd create bm0012.the.re:/dev/sdb bm0014.the.re:/dev/sdb bm0015.the.re:/dev/sdb
After a few seconds the cluster stabilizes, as shown with
# ceph -s
health HEALTH_OK
monmap e1: 3 mons at {bm0012=188.165:6789/0,bm0014=188.165:6789/0,bm0015=188.165:6789/0}, election epoch 24, quorum 0,1,2 bm0012,bm0014,bm0015
osdmap e14: 3 osds: 3 up, 3 in
pgmap v106: 192 pgs: 192 active+clean; 0 bytes data, 118 MB used, 5583 GB / 5583 GB avail
mdsmap e1: 0/0/1 up
A 10GB RBD is created, mounted and destroyed with:
# rbd create --size 10240 test1 # rbd map test1 --pool rbd # mkfs.ext4 /dev/rbd/rbd/test1 # mount /dev/rbd/rbd/test1 /mnt # df -h /mnt Filesystem Size Used Avail Use% Mounted on /dev/rbd1 9.8G 23M 9.2G 1% /mnt # umount /mnt # rbd unmap /dev/rbd/rbd/test1 # rbd rm test1 Removing image: 100% complete...done.
Disaster recovery on host failure in OpenStack
The host bm0002.the.re becomes unavailable because of a partial disk failure on an Essex based OpenStack cluster using LVM based volumes and multi-host nova-network. The host had daily backups using rsync / and each LV was copied and compressed. Although the disk is failing badly, the host is not down and some reads can still be done. The nova services are shutdown, the host disabled using nova-manage and an attempt is made to recover from partially damaged disks and LV, when it leads to better results than reverting to yesterday’s backup.
Continue reading
Minimal DNS spoofing daemon
When running tests in a controlled environment, it should be possible to spoof the domain names. For instance foo.com could be mapped into slow.novalocal, an OpenStack instance responding very slowly to simulate timeouts. A twisted based spoofing DNS reverse proxy is implemented to transparently resolve domain names with other domain names IP addresses, using a python hash table such as:
fqdn2fqdn = {
'foo.com': 'foo.me',
'bar.com': 'bar.me',
}
It will map foo.com to foo.me as follows:
$ sudo python dns_spoof.py 8.8.8.8 & $ ping -c 1 foo.me PING foo.me (91.185.200.115) 56(84) bytes of data. 64 bytes from 91.185.200.115: icmp_req=1 ttl=47 time=42.2 ms --- foo.me ping statistics --- 1 packets transmitted, 1 received, 0% packet loss, time 0ms rtt min/avg/max/mdev = 42.268/42.268/42.268/0.000 ms $ ping -c 1 foo.com PING foo.com (91.185.200.115) 56(84) bytes of data. 64 bytes from 91.185.200.115: icmp_req=1 ttl=47 time=42.2 ms --- foo.com ping statistics --- 1 packets transmitted, 1 received, 0% packet loss, time 0ms rtt min/avg/max/mdev = 42.290/42.290/42.290/0.000 ms
Update May 10, 2013: an easier solution is to configure your BIND resolvers to lie using Response Policy Zones (RPZ). Thanks to S. Bortzmeyer for pointing in the right direction.
Continue reading
nova-network debugging tips
A single machine is installed with Debian GNU/Linux OpenStack Folsom. Four instances are created and it turns out that nova-network is configured with the wrong public interface. It can be fixed without shutting down the instance:
nova suspend target1
The instance is suspended to disk (as if it was a laptop) and the corresponding KVM process is killed. While the instance is suspended, nova-network can be stopped.
/etc/init.d/nova-network stop
The source of the problem was a typo in the public interface leading to an incorrect VLAN interface
13: vlan100@eth2:mtu 1500 qdisc noqueue state DOWN mode DEFAULT link/ether fa:16:3e:54:5b:57 brd ff:ff:ff:ff:ff:ff
it can be fixed in the /etc/nova/nova.conf configuration file at the line:
public_interface = eth3
The incorrect VLAN interface is manually deleted and nova-network can be restarted. The instance is then resumed with
nova resume target1
and nova-network will automatically re-create the VLAN interface.
Continue reading
ceph internals : buffer lists
The ceph buffers are used to process data in memory. For instance, when a FileStore handles an OP_WRITE transaction it writes a list of buffers to disk.
+---------+
| +-----+ |
list ptr | | | |
+----------+ +-----+ | | | |
| append_ >-------> >--------------------> | |
| buffer | +-----+ | | | |
+----------+ ptr | | | |
| _len | list +-----+ | | | |
+----------+ +------+ ,--->+ >-----> | |
| _buffers >----> >----- +-----+ | +-----+ |
+----------+ +----^-+ \ ptr | raw |
| last_p | / `-->+-----+ | +-----+ |
+--------+-+ / + >-----> | |
| ,- ,--->+-----+ | | | |
| / ,--- | | | |
| / ,--- | | | |
+-v--+-^--+--^+-------+ | | | |
| bl | ls | p | p_off >--------------->| | |
+----+----+-----+-----+ | +-----+ |
| | off >------------->| raw |
+---------------+-----+ | |
iterator +---------+
The actual data is stored in buffer::raw opaque objects. They are accessed through a buffer::ptr. A buffer::list is a sequential list of buffer::ptr which can be used as if it was a contiguous data area although it can be spread over many buffer::raw containers, as represented by the rectangle enclosing the two buffer::raw objects in the above drawing. The buffer::list::iterator can be used to walk each character of the buffer::list as follows:
bufferlist bl;
bl.append("ABC", 3);
{
bufferlist::iterator i(&bl);
++i;
EXPECT_EQ('B', *i);
}
Upstream University at the OpenStack summit
What if contributing to OpenStack was made a lot easier by a few days of training? You could get this training at Upstream University, which was created shortly after the OpenStack design summit, in April 2012, with this sole goal of improving developers’ contribution skills. Upstream University has since coached new OpenStack contributors, from eNovance and Cloudwatt, developers; for the kernel Linux and many others. 
To celebrate its first year, Upstream University is organizing a session in advance of the next OpenStack summit, in Portland. If you can fly in two days ahead of the event to spend the weekend improving your OpenStack contribution skills, please consider submitting an application to attend the workshop. This a one-time offer for free training.
Continue reading
Chaining extended attributes in ceph
Ceph uses extended file attributes to store file meta data. It is a list of key / value pairs. Some file systems implementations do not allow to store more than 2048 characters in the value associated with a key. To overcome this limitation Ceph implements chained extended attributes.
A value that is 5120 character long will be stored in three separate attributes:
- user.key : first 2048 characters
- user.key@1 : next 2048 characters
- user.key@2 : last 1024 characters
The proposed unit tests may be used as a documentation describing in detail how it is implemented from the caller point of view.
Continue reading